
Tree Root Spread by Species From the Ground Up
Learn why tree roots lift sidewalks, how to diagnose the problem, and proven methods to stop repeat damage without killing the tree.
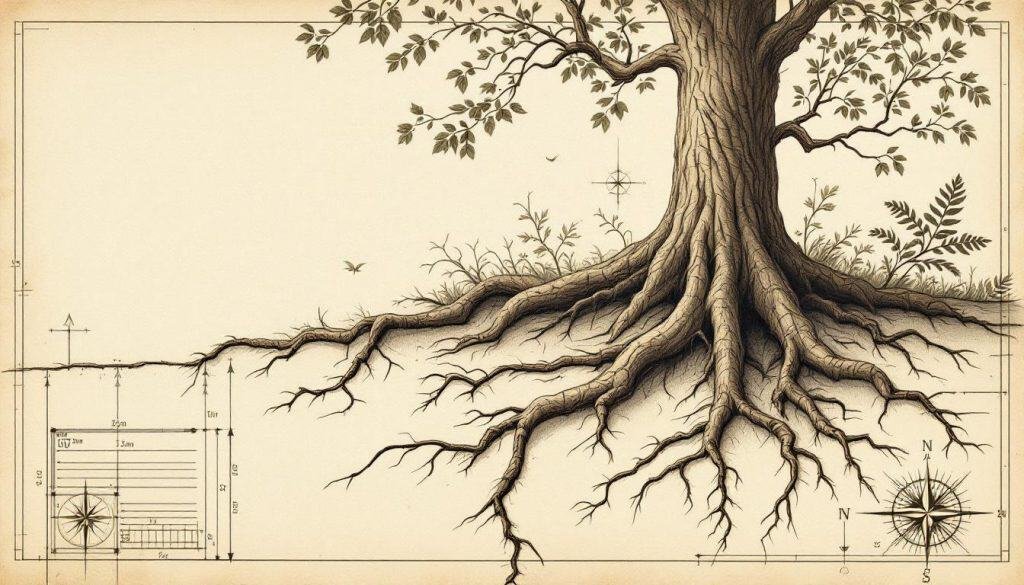
- Tree roots lift sidewalks because they grow 2-3× canopy width, mostly in the top 18 inches. Roots thicker than 1½ inch within 6 ft of concrete generate 1,000+ lb lifting force annually. Cutting roots inside 3× trunk diameter risks whole-tree failure and legal liability. Install 24-inch HDPE barrier angled 15° away to redirect growth downward permanently. For heritage trees or roots over 4 inches, hire an ISA Master Arborist for static-pull testing first.
You are staring at a 2-inch lip where the maple’s surface root has heaved the sidewalk slab. Maybe the city left a neon-orange trip hazard tag, or a neighbor’s lawyer letter arrived. Either way, you need to know: Can the root be cut without killing the tree? Will the sidewalk just crack again next year? And who pays—me, the city, or the tree? By the end of this guide, written by Michael J. Hartman, ISA Board Certified Master Arborist, you will know exactly why the damage happened, how to assess risk before you touch a root, and which repair method lasts longest for your climate and species.
Why Roots Heave Concrete: The Biology of Lift
Tree roots grow almost entirely in the top 18 inches of soil; University of Florida excavations show lateral roots extending 2–3 times the branch-spread diameter. When a root under a 4-foot-wide sidewalk is thicker than your wrist, it becomes a hydraulic jack every time it absorbs water and swells. In freeze–thaw climates, water inside the root freezes, expanding another ⅛ inch. Over five years that cyclic swelling pivots the slab upward. Meanwhile, the absence of a root barrier at planting allowed the root to grow directly beneath the 4-inch concrete pad, where oxygen and moisture are higher than in compacted street subgrade. Sugar maple, American elm, and Bradford pear are repeat offenders because they produce dense, plate-like lateral roots within 8 inches of the surface.
Root flare: The swollen trunk base where trunk tissue transitions to root tissue; proper depth is 1–2 inches above grade.
Concrete also acts as a radiant heat sink, accelerating root diameter growth in winter. A 2-inch caliper root can add another ½ inch of diameter annually under a warm slab, doubling lifting force in four years. Understanding this growth pressure lets you predict which repairs are temporary and which are permanent.
Diagnose Before You Cut: Identifying the Problem Root
Start 48 hours after a soaking rain; soil moisture makes root edges visible. Sweep debris off the crack and photograph the slab elevation with a 4-foot level across the joint. Measure root diameter at the point it disappears under concrete—anything over 1½ inch is structurally significant. Next, determine the distance from the trunk: if the root is inside a circle equal to three times trunk diameter, it is a major structural root and removal can destabilize the tree.
Warning Signs to Watch For
- Exposed root crown: Soil erosion reveals roots within 6 inches of trunk—cutting here risks fatal decay.
- Crack pattern parallel to curb: Indicates a single dominant root lifting; perpendicular cracks suggest soil settlement, not roots.
- Opposite-side lean: Tree tilt away from lifted slab means the root on the slab side is counterbalancing the canopy—do not cut.
Insert a 12-inch piece of rebar vertically beside the root; if you meet resistance less than 8 inches down, the root is shallow enough to graft a new sidewalk over it without cutting. Finally, check city code: many municipalities require an arborist report before root pruning in the right-of-way.
Root Pruning Without Killing the Tree
When the root is outside the 3× trunk-diameter zone, you can remove it safely using a two-step cut to prevent bark tearing. Dig a 12-inch-wide trench parallel to the sidewalk to expose the root’s underside. Make the first cut 18 inches back from the concrete edge—this relieves bending stress. Second, cut at the sidewalk face. Never leave a stub; flush cuts heal faster. Immediately install a root barrier: 24-inch-deep high-density polyethylene (HDPE) sheet, 80 mil thick, angled 15° away from the walk to deflect future roots downward.
Tools You Will Need
- Air-spade or supersonic air knife: Excavates soil without root damage; rent 185 cfm/90 psi unit.
- Pruning saw with 12-inch carbide blade: Cuts green wood without binding; bypass loppers for roots under 1 inch.
- Root barrier: 24-inch-depth HDPE, minimum 80 mil, ASTM D5514 compliant.
Backfill with 50/50 native soil and coarse sand to encourage deep-rooting. Water weekly for three months; stressed trees transpire less, so reduce irrigation volume 25 % the first summer to avoid root rot.
Sidewalk Repair Options That Last
Four common methods span a 20-year cost spectrum. Rubber composite pavers flex ¼ inch, accommodating annual root growth but require perimeter restraint. Foam-jacking (high-density polyurethane injection) lifts and stabilizes slabs for $12–$15 per square foot, yet degrades under UV unless capped. Cantilevered steel-reinforced “bridge” sidewalks span the root zone on micro-piles, leaving a 6-inch air gap; expect $45 per square foot but 30-year life. Complete relocation—moving the walk 3 feet around the root system—costs $70 per linear foot yet preserves both tree and pavement indefinitely.
| Rubber pavers | Foam-jacking |
|---|---|
| $8/sq ft, 10-year life, DIY-friendly | $14/sq ft, 15-year life, closed-cell foam |
| Flexes ¼ inch, UV fade | Needs 48 hr cure, won’t stop future lift |
Match method to tree value: heritage oaks justify bridge sidewalks; young poplars do not. Always leave a 2-inch expansion joint filled with self-leveling silicone so future lift breaks the joint, not the slab.
Preventing the Next Heave: Barriers and Design
New plantings within 10 feet of pavement need proactive defense. Install continuous root barrier at planting, 24 inches deep with the top 2 inches above grade to block surface roots. Choose decurrent species—those with deep rooting architecture—such as bur oak or hackberry instead of silver maple. Specify 6-inch-thick concrete with #4 rebar on 12-inch centers; the stiffness spreads load and resists 1,000 lb of root pressure. Finally, irrigate deeply but infrequently: 1 inch once a week encourages roots to grow downward chasing moisture rather than spreading laterally under the cool sidewalk.
Pro Tip: Angle the root barrier 15° away from the pavement; roots hit the plate and deflect downward instead of skimming underneath.
For existing healthy trees, install a structural soil trench under the walk: 12 inches of gap-graded stone wrapped in geotextile provides both load-bearing and root space. This “Silva Cell” system has prevented re-heaving on Boston’s Boylston Street plane trees for 18 years and counting.
Timing and Legal Considerations
Root pruning is least stressful during dormancy: after leaf drop in November through early March. Avoid cutting between bud-break and full leaf expansion (April–May) when carbohydrate reserves are lowest. Emergency trip-hazard mitigation can proceed in summer, but increase post-cut watering by 50 %. Most cities require a permit to alter right-of-way; expect a 10-day review and mandatory replanting if canopy loss exceeds 25 %. Homeowners insurance typically denies claims for “tree maintenance,” yet pays when roots damage foundations, so document everything with photos and an arborist letter.
When to Act
Best window: November 15 – March 15. Outside this window, expect slower wound closure and higher die-back risk, especially on oak and birch.
If the lifted slab is city property, call public works; many will split cost 50/50 if you handle the arborist report. Private sidewalks are owner responsibility—budget $1,200 for a 30-foot single-lift repair plus $350 for the arborist inspection.
When to Call a Certified Arborist
Bring in a Master Arborist when the root is inside the critical root zone (3× trunk diameter), the tree leans toward target structures, or decay fungi are visible on the root or trunk. Any root over 4 inches diameter within 5 feet of the trunk is a stability anchor; removal requires static-pull testing or Air-Spade root mapping to quantify wind-throw risk. Finally, if canopy die-back exceeds 15 % after a previous root cut, residual root rot may be present—an arborist can install cabling or lightning protection to mitigate hazard.
Common Mistakes to Avoid
- Flush-cut against concrete: Leaves a hollow where decay fungi enter the trunk; always cut back to a lateral root junction.
- Installing shallow barrier: 12-inch panels block nothing—maple roots dive under and reemerge; use full 24-inch depth.
Request proof of ISA certification and insurance listing tree work; general landscapers often lack coverage for concrete cutting. A written mitigation plan should specify wound treatment, soil replacement, and a two-year post-construction monitoring schedule.
What to Do Next: Action Checklist
Start today by photographing the lifted joint and measuring root diameter and distance from trunk. If the root is under 1½ inch and 6 feet from the trunk, rent an air-spade, prune the root, install a 24-inch barrier, and repour the slab with expansion joints. If the root is larger or closer, schedule an ISA certified arborist within two weeks—delays increase liability if someone trips. While waiting, paint a 1-inch white line across the raised edge to highlight the hazard and reduce lawsuit exposure. Finally, budget for a long-term fix: rubber pavers for quick relief, foam-jacking for 15-year control, or a bridged sidewalk when the tree is a high-value heritage specimen. Act this winter and you will walk level for decades without sacrificing the shade that keeps your cooling bill low.
